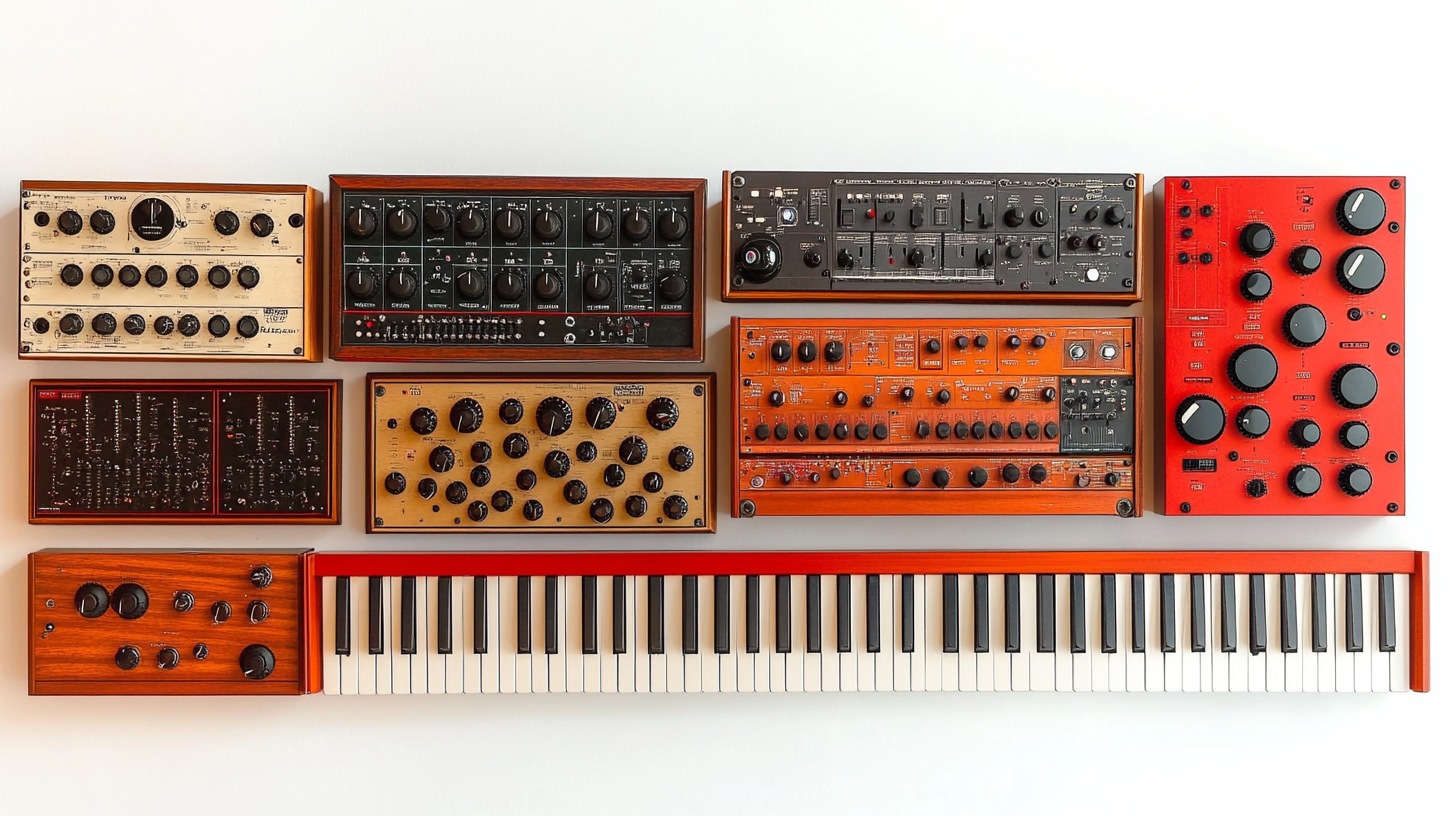
Most producers spend years adjusting presets without ever understanding what the controls actually do. That’s fine for getting results quickly, but it creates a ceiling: when a preset is close but not right, you have no framework to fix it. This article breaks down how subtractive synthesis works and ends with a concrete bass patch you can build in Ableton’s Analog from scratch.
What a synthesizer actually is
A synthesizer generates sound electronically, rather than recording it from the physical world. The most common type, subtractive synthesis, starts with a harmonically rich signal and removes content until you have the sound you want. The name comes from that process: you’re subtracting frequencies.
This is the opposite of how most people intuitively approach sound design. Instead of building a sound up by adding elements, you start with something complex and carve it down. Understanding that principle changes how you use every control on a synth.
The four fundamental blocks
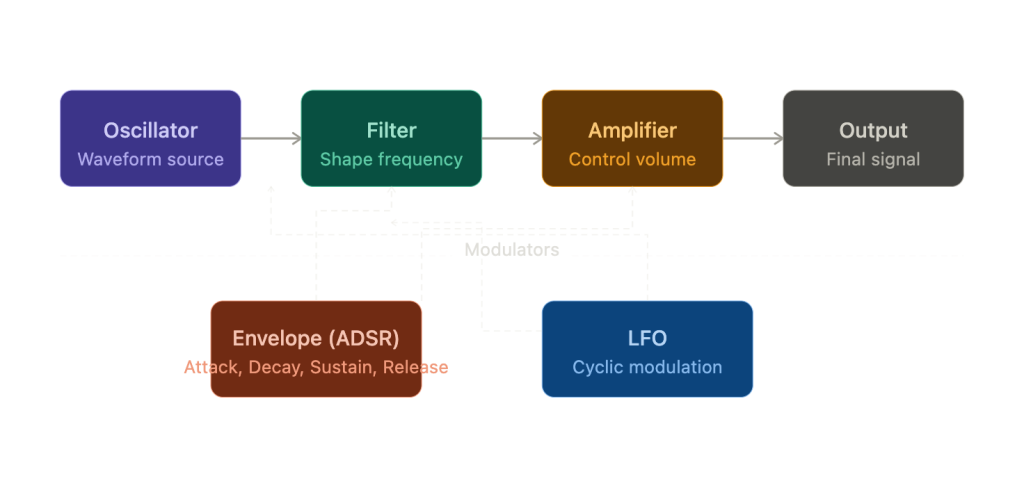
A subtractive synthesizer has four essential components that always appear in the same order: oscillator, filter, amplifier, and envelope. Every other control on a synth modifies or interacts with one of these four.
The oscillator is the sound source. It generates a continuous waveform at a specific pitch. The shape of that waveform determines its harmonic content: a sine wave is a pure tone with almost no overtones, while a sawtooth wave is dense with harmonics and sounds bright and buzzy. Square waves sit somewhere between the two, producing a hollow, reedy character. In Ableton Analog, you can mix two oscillators together and detune them slightly to create a thicker, more complex source before you even touch the filter.
The filter is where the real sculpting happens. In subtractive synthesis, the most common type is a low-pass filter, which removes frequencies above a cutoff point. The further you lower the cutoff, the darker and more muffled the sound becomes. The resonance control boosts frequencies around the cutoff point, adding a characteristic peak that can range from a subtle emphasis to a sharp, aggressive sweep. In most bass sounds, a slow filter sweep opening from a low cutoff to a higher one is what creates that sense of a sound “coming alive.”
The amplifier controls the output volume of the signal. On its own, it would just produce a constant tone. That’s where envelopes come in.
The envelope shapes how a parameter changes over time, triggered by a MIDI note. The four stages are Attack, Decay, Sustain, and Release (ADSR). Attack determines how long it takes for the parameter to reach its maximum value after a note is triggered. Decay is how long it takes to fall from that maximum to the Sustain level. Sustain is the level held for as long as the note is held. Release is how long the parameter takes to fall to zero after the note is released. Most synths have at least two envelopes: one controlling the amplifier and one controlling the filter cutoff. A short attack and decay on the filter envelope creates a percussive “pluck” effect; a long attack creates a slow swell.
The LFO
A low-frequency oscillator (LFO) is like an envelope that loops continuously. Instead of triggering once per note, it oscillates between values repeatedly at a rate you control. Assign an LFO to the filter cutoff and you get an automatic filter wobble. Assign it to pitch and you get vibrato. Assign it to amplitude and you get tremolo. The LFO’s speed and shape change the character of the modulation entirely.
Building a bass patch in Analog
Open a new MIDI track in Ableton and load Analog (found under Instruments). Start with the Init preset if one is available, or manually reset the key values.
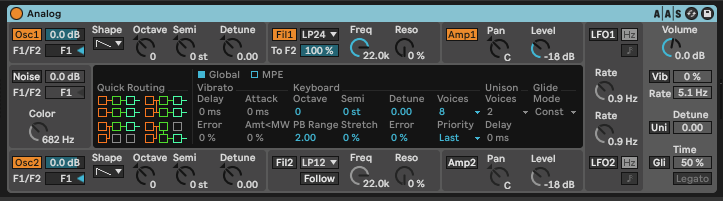
Set Oscillator 1 to a sawtooth wave. This gives you a bright, harmonically rich starting point. Set the volume to around 80%. Add Oscillator 2 and tune it down one octave (12 semitones). Set its volume to around 50%. This adds low-end weight without muddying the fundamental.
Move to the filter section. Set the filter type to a low-pass (LP) and bring the cutoff down to around 400-600 Hz. Set resonance to around 20-25%. Now open the filter envelope and set a short Attack (0-5 ms), a Decay of around 300-400 ms, a Sustain at 30%, and a Release of around 100 ms. Increase the envelope amount to taste. You should now hear the filter opening briefly at the start of each note, which gives the bass its attack character.
For the amplitude envelope, set Attack to 0 ms, Decay to about 100 ms, Sustain to 80%, and Release to about 80 ms. This keeps the bass present and defined without clicks at the start or an abrupt cutoff at the end.
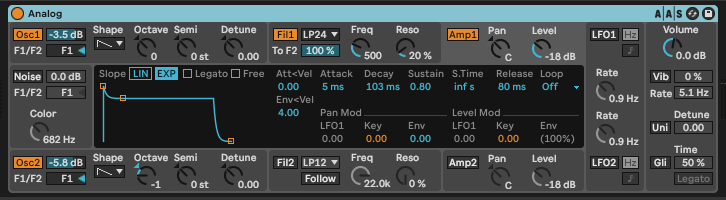
Play a pattern on a low note (E1 or F1 works well). What you should hear is a clean, filter-driven bass that responds dynamically to every note.
Next steps
This patch is a functional starting point, not a finished sound. From here, explore what detuning the oscillators does to the width and movement of the bass. Try modulating the filter cutoff with a slow LFO to add subtle movement over time. Adjust the envelope decay to make the attack character more or less pronounced.
The goal at this stage isn’t to sound like a specific genre. It’s to understand why a control does what it does and be able to predict the result before you move the knob. Once that connection is clear, any preset becomes readable, and any sound becomes buildable.
Try it now: Build the patch described above, then change only one variable at a time. First, swap the sawtooth for a square wave and compare. Then, increase the filter resonance until the cutoff starts to self-oscillate. Then, extend the filter envelope attack to 200 ms and notice how the feel of the bass changes. Document what you hear.
Use our synth and test what you just learned
Sources and further reading:
- Ableton official documentation: Learning Synths (interactive, browser-based)
- Sound On Sound: “Synth Secrets” series by Gordon Reid
- YouTube: Underdog, Intro to Subtractive Synthesis
- Ableton Learn: How Analog Works
Learn to produce electronic music.
Structured courses, interactive tools and real-world references. Built for producers who are just starting out.