Sketch your first track in the browser: no DAW, no downloads

The real obstacle to starting is rarely talent. It is friction. Installing a DAW, learning where every button lives, and reading a manual before you have heard a single idea of your own play back is enough to stop most people before they start. The Mini Studio removes that step entirely: a sequencer, a three-track piano roll and a small mixer, running fully in your browser, no installation and no account required.

This article walks through building a complete eight-bar sketch from nothing, start to finish, inside the Mini Studio itself.

What the Mini Studio actually is

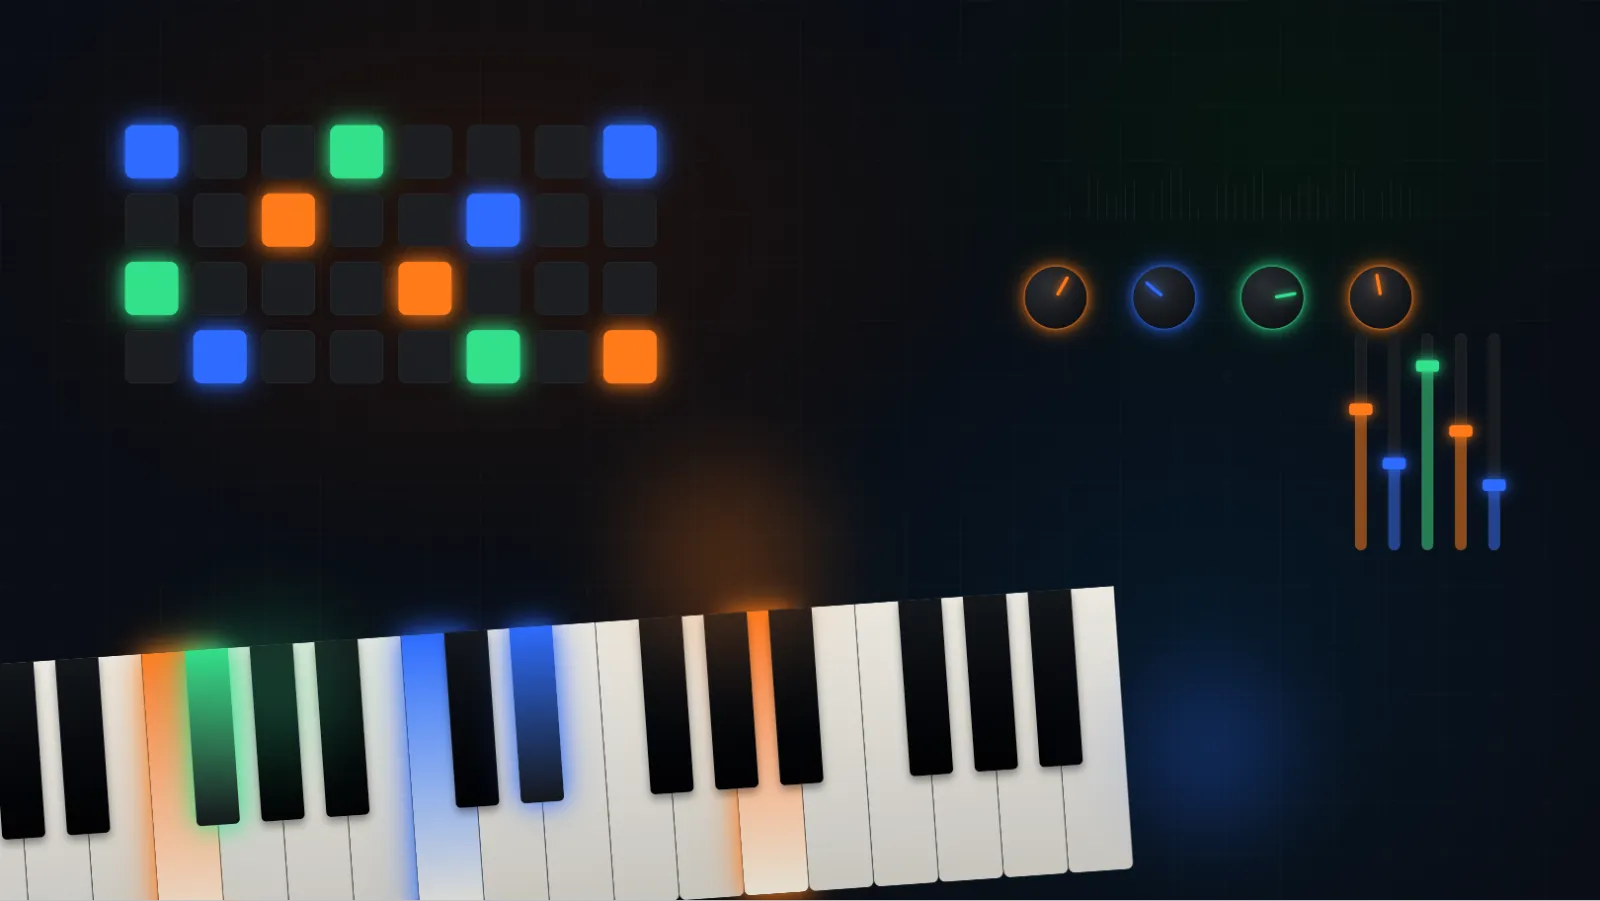
It combines a drum sequencer with a piano roll covering three melodic tracks, bass, chords and lead, plus a small mixer with EQ, compressor, saturation and a limiter on the master bus. Nothing here is a scaled-down toy version of a real workflow. It is the same set of decisions you make in any DAW, just reduced to the tools you actually need for a first sketch.

None of this requires prior production experience. If a term below is unfamiliar, treat it as a hands-on preview of what you will study properly later, not a prerequisite you need to already know.

Browser tool, no DAW required

Open the Mini Studio

Keep it open in a separate tab as you read. Every step below happens directly inside it.

Open the Mini Studio ↗

Step 1: the rhythm

Start with the drum sequencer, not the melody. Program a simple four-on-the-floor pattern, kick on every beat, a clap or snare on beats two and four, hi-hats filling the gaps between. Keep it sparse at this stage. It is much easier to add elements to a rhythm that already feels good than to strip away one that already feels crowded.

Step 2: the bass

Switch to the bass track in the piano roll and keep it deliberately simple, two or three notes is plenty for a first sketch. The goal here is not a clever bassline, it is a bassline that locks in with the kick you just programmed. Play it back against the drums a few times and adjust timing before adding anything else.

Step 3: chords and lead

With rhythm and bass in place, build the harmonic layer on top. A short, repeating chord progression on the chords track gives the sketch its emotional color, and a simple lead line, even just a few notes, gives it a melodic hook to hold onto. Neither needs to be complicated. An eight-bar sketch survives on a strong, simple idea far better than on a busy one.

Step 4: a light mix pass

Open the mixer and make small adjustments rather than dramatic ones. A touch of EQ to stop the bass and the kick from crowding the same low end, a light compressor to keep the mix feeling glued together, a little saturation if something feels thin, and the limiter set conservatively just to catch stray peaks. The goal at this stage is not a finished master, it is a sketch that sounds clear enough to judge fairly.

Step 5: listen to it loop

Play the full eight bars back in a loop and listen to it the way you would listen to someone else's track. Does the rhythm hold interest on its own? Does the bass and kick relationship feel tight or muddy? Does the chord progression still feel good on the fourth repeat? These are the same questions you will ask about a full track later, just compressed into eight bars where they are much faster to answer.

Try this now

Set a 20-minute timer and build one complete eight-bar sketch following the five steps above, in whatever genre feels natural. Do not aim for polish. Aim for a loop that plays back cleanly and that you would not be embarrassed to have someone else hear.

Where this leads

What you just built is a smaller version of the exact workflow behind every finished track, the same sequence covered in our article on how to learn electronic music production. The Mini Studio is deliberately compact, it is meant for sketching an idea quickly, not for finishing a release. When you are ready to take a sketch like this and turn it into a complete, exportable track built specifically around House, Techno and Organic House, with a full DAW workflow and all 19 interactive tools included, that is exactly what EMPB is built to teach.

OHXALA RECORDS Academy

Electronic Music Production for Beginners

From an eight-bar sketch to a finished, exportable track, taught in sequence, with hands-on assignments and the full library of interactive tools.

Explore the course ↗

LUFS, loudness and limiting: what your master actually needs

For years, mastering louder than the track before yours was a real competitive advantage. It is not anymore. Every major streaming platform now measures how loud your track actually is and turns it down if it exceeds their target, which means a master pushed to the edge of distortion does not play back any louder than a well-balanced one, it just plays back more squashed. Understanding LUFS is what tells you when to stop pushing the limiter.

What LUFS actually measures

LUFS stands for Loudness Units Full Scale, and it measures perceived loudness averaged over time, not the height of the tallest peak in your waveform. This is the detail that trips people up: a peak meter tells you the loudest single moment in a track, LUFS tells you how loud the track feels as a whole. Two masters can share an identical peak level and still sound completely different in loudness, because one has short, controlled peaks over a dense, high-energy body, and the other has occasional spikes over mostly quiet material.

Integrated LUFS, the number platforms actually use, is measured across the entire track from start to finish. It is the figure that decides whether a platform turns your track up, down, or leaves it alone.

What limiting actually does

A limiter is a compressor with an extremely high ratio and a fast attack, set to catch anything that tries to cross a ceiling and stop it dead. Where a compressor gently controls a range, a limiter enforces a hard boundary that nothing is allowed to pass. That makes it the last tool in a mastering chain, not a substitute for the mixing decisions that came before it.

Pushed gently, a limiter adds a small amount of density and keeps occasional peaks from clipping. Pushed hard, it starts noticeably changing the shape of the sound: transients get flattened, the sense of punch disappears, and at extreme settings audible distortion creeps in as the limiter works overtime to catch everything. The relationship between attack and release on a limiter follows the same logic as on a regular compressor, just at a more extreme setting, so if that part still feels unclear, our article on how compressors actually work covers the underlying mechanics.

Reference numbers, without treating them as gospel

Streaming platforms have mostly converged on similar targets. Spotify normalizes to around minus 14 LUFS integrated in its default listening mode, with a quieter minus 23 LUFS option and a louder minus 11 LUFS option that most listeners never touch. YouTube sits close to the same minus 14 LUFS mark. Apple Music runs slightly quieter, around minus 16 LUFS. A true peak ceiling around minus 1 to minus 2 dBTP is a common safety margin across all of them, leaving headroom for the lossy encoding every platform applies after upload.

These numbers are useful as a sanity check, not as a target to hit exactly. Mastering to precisely minus 14.0 LUFS is not meaningfully better than landing at minus 13.4 or minus 14.8. What actually matters is staying in the neighborhood while keeping the track dynamic enough to still have impact.

What happens when you push too far

A master driven several dB past a sensible loudness target does not get louder on a platform that normalizes loudness, since the platform turns it back down anyway. What it does get is worse: crushed transients that make drums lose their snap, reduced dynamic range that makes a track feel flat and one-dimensional next to the music around it, and at extreme settings, audible distortion from the limiter running out of room to work cleanly. A track competing for attention by being technically louder loses that fight the moment it hits a platform that measures loudness, and loses a second fight against the listener's ears, since a fatiguing, dynamics-free master is simply less pleasant to listen to on repeat.

A simple, practical order of operations

Master for dynamics first, check the LUFS number second, not the other way around. Get the mix balanced, the low end under control, and the overall energy feeling right with the limiter doing light, mostly invisible work. Only then check where the integrated LUFS reading lands. If a track needs heavy limiting just to reach a loudness target, the problem usually sits earlier in the mix, not in the limiter settings, and pushing the limiter harder will not fix a mix that has too much competing energy in the same frequency range.

Interactive tool: Limiter Visualizer
Try this now

Tap the visualizer above to activate audio, then start with light gain reduction and listen to how the transients still breathe. Slowly push the input gain further and watch the waveform flatten as the limiter works harder. Keep going until distortion becomes audible, then back off to the last setting that still sounded clean. That point, not the loudest possible setting, is usually where the limiter should sit.

Loudness is a byproduct, not the goal

The old instinct to master as loud as possible made sense before normalization existed, when loudness itself was a competitive edge on a shuffled playlist. That edge is gone. What is left is a track that either has punch, clarity and dynamic range, or does not, and no amount of limiter gain fixes a mix that was not solid to begin with. Chase a master that sounds good at a sensible level, and the LUFS number tends to take care of itself.

If EQ and compression still feel like separate, disconnected steps rather than a single chain leading here, our articles on EQ basics and compression cover the two steps that come before this one.

OHXALA RECORDS Academy

Electronic Music Production for Beginners

Mixing and mastering fundamentals like this one, taught in sequence, with hands-on assignments and the full library of interactive tools.

Explore the course ↗

How compressors actually work: threshold, ratio, attack and release you can hear

Compression gets sold as a way to make things louder, and that framing causes most of the confusion around it. A compressor does not make anything louder on its own. It reduces the distance between the quietest and loudest parts of a signal, and that narrower range is what then gets turned up without clipping. Everything a compressor does follows from that one idea: it is a tool for controlling range, not volume.

The four core controls, threshold, ratio, attack and release, are usually taught as isolated settings. They only make sense together, and the sections below build them up through what you actually hear rather than what each knob is labeled.

Threshold and ratio: when it kicks in, and how hard

Threshold sets the level a signal has to cross before the compressor does anything at all. Below threshold, the signal passes through completely untouched. Above it, the compressor starts pulling the level down.

Ratio decides how hard that pull is. A 2:1 ratio is gentle, for every 2dB the signal goes over the threshold, only 1dB gets through. A 10:1 ratio is aggressive, 10dB over threshold becomes just 1dB of actual increase, which is close to the territory where a compressor starts behaving like a limiter. Low ratios are for smoothing a signal without it being obvious. High ratios are for catching peaks that would otherwise blow past everything around them.

Threshold and ratio together decide how much gain reduction happens. Neither one means anything on its own, a low threshold with a low ratio can produce the same amount of reduction as a high threshold with a high ratio, just shaped differently.

Attack: the most underrated decision on the compressor

Attack is how long the compressor waits, after the signal crosses the threshold, before it actually starts reducing gain. This single setting decides whether the initial transient, the sharp, percussive front edge of a sound, gets through untouched or gets caught by the compressor along with everything else.

A fast attack grabs that transient immediately, which tames sharp peaks but can also drain the punch out of a drum hit if pushed too far. A slow attack lets the transient pass through uncompressed before the compressor engages, which is exactly how many drum bus compressors add perceived punch: the initial hit stays sharp, and only the sustain gets pulled down afterward. There is no universally correct attack time. The decision is always about which part of the sound you want to protect and which part you are willing to control.

Release: letting go, and the risk of pumping

Release controls how long the compressor takes to stop reducing gain once the signal drops back below the threshold. A fast release lets the signal snap back to full level almost immediately, which can sound energetic on a bassline but audibly pumps if it happens in time with the beat in a way you did not intend. A slow release holds the gain reduction longer, smoothing things out but risking a compressor that never fully lets go between hits, flattening the dynamics of an entire passage.

This is also the setting most responsible for the classic sidechain pumping effect used deliberately in house and techno, where a bass or pad audibly ducks and swells in time with the kick. Used on purpose, it is a rhythmic tool. Used by accident, on a vocal or a full mix, it just sounds like the track is breathing when it should not be. Attack and release on a compressor are conceptually close to the attack and release stages of an ADSR envelope, they both describe how something changes over time, just applied to gain reduction instead of a note.

Case study: leveling an uneven vocal

A vocal that jumps between whisper-quiet and suddenly loud is the textbook use case for compression as a leveling tool. A moderate threshold, a ratio around 3:1 to 4:1, a fast-ish attack to catch the loud moments, and a medium release that lets the gain recover between phrases rather than mid-word, brings the quiet and loud parts closer together without anyone noticing the compressor is there. The goal in this case is invisibility: if a listener can point to the exact moment compression is happening, it is usually working too hard.

Case study: punchy drums without killing them

Drum bus compression asks for the opposite instinct. Here, a slower attack, enough to let the initial transient of the kick and snare through uncompressed, paired with a fast to medium release and a moderate ratio, adds glue and perceived punch instead of squashing everything flat. The compressor is doing real work, gain reduction is happening, but it is acting on the tail of each hit rather than the strike itself, which is why the result sounds more powerful instead of smaller.

Interactive tool: Compressor Visualizer
Try this now

Set up the vocal-leveling case first: moderate threshold, ratio around 3:1, fast attack, medium release, and watch how consistently the gain reduction meter moves. Then, without resetting, slow the attack down significantly and switch to a fast release. Notice how the same source now pumps and breathes instead of sitting still, even though threshold and ratio never changed.

Compression is a decision, not a volume boost

Every setting on a compressor is really a decision about which part of a sound to protect and which part to control. Threshold and ratio decide how much happens. Attack and release decide when it happens, and it is that timing, more than the amount of gain reduction, that determines whether compression sounds transparent, punchy, or obviously pumping.

Compression sits naturally after EQ in most mixing workflows, since a cleaner frequency balance gives a compressor less unwanted material to react to. Our article on EQ basics covers that earlier step, and the attack and release logic here connects directly back to ADSR envelopes if you want to see the same time-based thinking applied to synthesis instead of dynamics.

OHXALA RECORDS Academy

Electronic Music Production for Beginners

Mixing fundamentals like this one, taught in sequence, with hands-on assignments and the full library of interactive tools.

Explore the course ↗

EQ basics for electronic music: an interactive guide

EQ is usually taught as a list: sub bass here, low mids there, presence around here, air up top. The list is accurate and mostly useless on its own, because nobody reaches for EQ because they want to adjust "low mids." They reach for it because the kick and the bass are fighting, or the vocal sounds dull, or the hi-hats are cutting through like glass. This article works backward from those problems instead of forward from a frequency chart.

Each section below names a problem you can actually hear, then explains which part of the spectrum is usually responsible. The EQ visualizer embedded further down lets you create and hear each fix directly.

Learn the spectrum by ear, not by numbers

Before fixing anything, it helps to know roughly what lives where. Sub bass, below about 60Hz, is felt more than heard, the low end of a kick or a sub bass patch. Bass, from roughly 60Hz to 250Hz, is where most of the punch and warmth of kicks, basslines and low toms live. Low mids, 250Hz to 500Hz, is the zone most responsible for a mix sounding muddy when it has too much energy. Mids, 500Hz to 2kHz, carry the body of vocals, snares and most melodic instruments. Upper mids, 2kHz to 6kHz, is where presence and clarity live, and also where harshness creeps in in when pushed too hard. Air, above roughly 8kHz, adds sparkle and openness without much perceived loudness.

None of these boundaries are exact, and every source overlaps its neighbors. The goal is not to memorize the numbers, it is to build a rough map so that when something sounds muddy or harsh, you already have a guess about where to look before you touch a single knob.

Cut before you boost

The single most underused habit in EQ is cutting instead of boosting. Boosting a frequency adds energy and often adds loudness, which can trick your ears into thinking a change sounds better simply because it is louder. Cutting removes energy that is competing with something else, which usually creates more actual clarity than any boost does.

A practical default: if a sound feels thin, resist the urge to boost highs first. Try cutting the low mids of a competing element instead. Clarity in a mix is often less about adding brightness and more about removing the mud that was hiding it.

The kick and bass problem

This is the most common frequency conflict in electronic music. Both the kick and the bass want to live in roughly the same 60Hz to 150Hz zone, and when they both get full energy there, the low end turns into an undefined rumble instead of two distinct, punchy elements.

The standard fix is complementary EQ: decide which element owns which part of the low end, then cut the other one out of that space. A common approach gives the kick a focused punch around 60 to 80Hz and a click around 2 to 4kHz for attack, while the bass gets a gentle cut in that same 60 to 80Hz pocket so it does not compete, keeping its own weight lower or higher depending on the sound. Neither element needs to disappear from the other's range entirely, but giving each one a zone where it is dominant is what makes a low end read as tight instead of muddy.

Making space for a vocal or lead

A vocal or lead that sounds dull or buried usually has nothing wrong with it in isolation. The problem is usually a low mid buildup around 250 to 500Hz coming from pads, guitars or synth layers stacked underneath it, masking the exact range where vocal warmth and clarity live.

A small, wide cut in that 250 to 500Hz range on the supporting elements, rather than a boost on the vocal itself, is often the fastest way to make a vocal or lead cut through without sounding artificially bright. Boosting the vocal to compensate for a crowded mix usually just makes everything louder together, not clearer.

Taming harshness and excess brightness

Harshness usually sits in the upper mids, roughly 2 to 5kHz, the same range responsible for presence when used well. Pushed too far, that same range turns aggressive, tiring to listen to at volume, and fatiguing over a full track. Hi-hats, cymbals and bright synth leads are the usual sources.

A narrow cut in the specific frequency where the harshness lives, found by sweeping a boosted band until the offending frequency jumps out, then pulling it down instead of boosting it, is the standard technique here. It is more surgical than a broad high cut, which tends to dull the whole sound instead of removing just the offending sliver.

Interactive tool: EQ Visualizer
Try this now

Recreate all three fixes from this article in the visualizer above. First, cut around 250 to 400Hz to hear how low mid removal changes clarity. Then set up a narrow cut around 3kHz and sweep it back and forth to hear how a small frequency range can sound harsh in isolation even when it barely changes the overall tone. Finally, try a gentle cut on one band around 70Hz and notice how much punch you can remove without the sound feeling thin.

EQ solves problems, not taste

Every example above is a subtractive fix, removing something that is getting in the way of something else. Boosting has its place too, mostly for adding character rather than fixing conflicts, but it is worth building the habit of reaching for a cut first. A mix with every element gently making room for its neighbors, rather than every element fighting to be loudest, is what actually reads as professional, regardless of genre.

If you are still deciding what to build a sound out of in the first place, our article on how synthesizers work and the follow-up on ADSR envelopes cover the earlier steps in that chain.

OHXALA RECORDS Academy

Electronic Music Production for Beginners

Mixing fundamentals like this one, taught in sequence, with hands-on assignments and the full library of interactive tools.

Explore the course ↗

ADSR envelopes explained: hear every parameter in real time

Most explanations of ADSR start with a diagram: a little mountain shape labeled attack, decay, sustain, release. It is accurate, and it teaches almost nothing on its own, because ADSR is not a shape you look at, it is a shape you hear. Four numbers control how a sound begins, settles, holds and disappears, and the only way to actually learn what each one does is to change it and listen to the difference.

This article does that. Each section below isolates one of the four parameters, explains what it controls, and lets you hear it directly in the synthesizer embedded further down, before putting all four together.

Attack: how fast the sound arrives

Attack is the time it takes a sound to go from silence to its peak volume once you press a key. At zero, the sound appears instantly, which is what gives a pluck or a hi-hat its percussive snap. Stretch the attack to a few hundred milliseconds and the same note fades in instead of hitting, which is the difference between a stab and a pad.

A useful reference point: most plucks and basslines sit near zero attack, because any delay before the note fully arrives reads as sluggish in a rhythm section. Pads and swells do the opposite, often with an attack of half a second or more, because the slow arrival is the entire point of the sound.

Decay: the drop after the peak

Decay is the time it takes the sound to fall from that initial peak down to whatever level you set as sustain. This is easy to confuse with attack, since both are time values, but they control different things: attack is the climb, decay is the fall that happens immediately after, whether or not you are still holding the key.

A short decay gives a sound a percussive character even with a slow attack, since the volume drops away quickly regardless of how it arrived. A long decay lets the peak linger before settling, which is common in plucky bass sounds that need an initial bite followed by a rounder body.

Sustain: the one parameter that is not time

Sustain breaks the pattern. Attack, decay and release are all durations, measured in milliseconds or seconds. Sustain is a level, not a time, and it only matters for as long as you keep the key held down. It answers one question: once the initial attack and decay have happened, how loud does the note stay while you continue to hold it?

Set sustain to zero and the sound always falls silent after the decay phase, no matter how long you hold the key, which is what makes plucks and short drum hits behave the way they do regardless of how long a note is technically held in your DAW. Set sustain high and the note holds close to full volume for as long as you keep it down, the way an organ or a held pad behaves.

Release: the tail after you let go

Release is the only stage that happens after you stop holding the key. It controls how long the sound takes to fade to silence once the note ends. A release of zero cuts the sound off the instant you release the key, which is what gives short, tight sounds their precision. A long release lets the sound ring out well past the point where you have already moved to the next note, which is where reverb-like tails and smeared, ambient textures come from, even without any reverb plugin involved.

Release is also the parameter most responsible for a mix turning to mud. A pad with a four-second release stacked under a fast arpeggio will bleed into every new note, blurring the rhythm underneath it. If a part sounds smeared for no obvious reason, release is usually the first place to check.

Putting the four together

Three reference shapes cover most of what you will build early on, and each one is really just a different balance of the same four parameters.

A pluck uses a fast attack, a fast decay, low or zero sustain, and a short release, so the whole note is essentially the attack and decay phases compressed into a fraction of a second. A pad flips almost every value: a slow attack, little to no audible decay, high sustain, and a long release, so the note blooms in gradually and lingers after you let go. A bass sits between the two, usually a fast attack for punch, a short to medium decay, moderate to high sustain so the note holds steady under a beat, and a short release so it does not bleed into the next note in the pattern.

None of these are rules. They are starting points that make the relationship between the four parameters audible, and once you can hear what each one is doing, adjusting them by ear becomes far faster than reading a manual.

Interactive tool: ADSR Envelope
Try this now

Build the pluck first: attack all the way down, decay short, sustain at zero, release short. Tap play and listen. Now, without touching anything else, drag attack up slowly and listen to the same sound turn into a swell. Then tap between the Pluck and Pad presets directly to hear that same contrast instantly, and try Organ, Piano and Perc to see how each maps onto the four parameters differently.

Where this fits

ADSR is not unique to synthesizers. The same four controls, or a close variant of them, show up on samplers, drum machines and even some compressors, where attack and release control how the compressor reacts to a signal rather than how a note sounds. Once the concept is familiar from a synth, recognizing it elsewhere becomes automatic, which is one reason it is worth learning by ear early rather than treating it as one more preset menu to skip past.

If you want to see where the envelope sits inside the rest of a synth's signal path, alongside oscillators and filters, our article on how synthesizers work covers the full picture. And if ADSR is one of the first concepts you are tackling in a structured way, the five-phase path in how to learn electronic music production shows where it fits into the bigger sequence.

OHXALA RECORDS Academy

Electronic Music Production for Beginners

Sound design fundamentals like this one, taught in sequence, with hands-on assignments and the full library of interactive tools.

Explore the course ↗
Further reading

How to learn electronic music production

Most people who try to learn electronic music production do not fail because they lack information. They fail because they consume that information in the wrong order. A tutorial on sidechain compression watched before you can program a convincing beat teaches you a technique you cannot yet use. A video on advanced sound design watched before you understand an envelope leaves you with presets you cannot modify. The result is a folder full of eight-bar loops and no finished tracks.

The fix is not more content. It is sequence. Below are five phases, in the order that actually works, each with something you can practice immediately instead of just reading about.

Phase 1: learn to hear before you learn to make

Before touching a DAW, pick one reference track in a genre you want to produce and take it apart mentally, layer by layer. Isolate the kick. Then the rest of the drums. Then the bass. Then the harmonic layer, whether that is a chord progression or a pad. Then the lead or the vocal hook. Most beginners skip this step and go straight to making sounds, which means they are building without a blueprint.

This is a skill, not a talent, and it improves with repetition. If you want a structured way to train it, our articles on active listening training and using reference tracks go deeper into the method.

Phase 2: rhythm comes first, not melody

Electronic music is built from the drums up. A track with a mediocre melody and a great groove still moves people. A track with a beautiful melody and a flat, static beat rarely does. So the first thing worth building with your own hands is a rhythm, not a tune.

Start with a simple four-on-the-floor pattern: kick on every beat, a clap or snare on beats two and four, hi-hats filling the gaps. Then break the grid slightly, moving a hat off the exact sixteenth note or adding a small amount of swing, because rigid, quantized rhythm is what makes early productions sound synthetic.

Interactive tool — Drum Box
Try this now

Open the Drum Box above and program a basic four-on-the-floor pattern at 122 BPM. Add a clap on the off-beats, then introduce swing until the groove feels less mechanical.

Phase 3: build your first sound from scratch

Once you have a beat, the next skill is making a sound instead of only browsing presets. You do not need to understand modular synthesis to do this. You need three concepts: the oscillator, which generates the raw waveform; the filter, which shapes which frequencies pass through; and the envelope, which controls how the sound evolves over time, commonly broken into attack, decay, sustain and release.

A simple bassline is the best first project, because it forces you to make decisions about pitch, filter cutoff and envelope shape that are audible immediately. If you want the full breakdown of these three pillars, our article on how synthesizers work walks through each one in detail.

Interactive tool — Synthesizer
Try this now

Open the synthesizer above and build a two-note bassline. Close the filter cutoff until the sound feels dark, then slowly open it and listen to how the tone changes.

Phase 4: turn the loop into a sketch

This is where most self-taught producers get stuck, and it is the reason so many folders are full of unfinished eight-bar ideas. A loop is not a track. A track needs a beginning, a point of tension, a release and an ending, even in its simplest form.

The way out is not to think bigger. It is to think in sections. Take the beat from phase two and the bassline from phase three, then sketch four short sections: a sparse intro, a fuller main section, a stripped-down breakdown, and a short outro. You do not need a full studio to do this exploration. The Underdog Electronic Music School channel has a clear breakdown of this exact problem, worth watching alongside this phase.

"The way out of the 8-bar loop" — Underdog Electronic Music School
Browser tool — no DAW required

Sketch your idea in the Mini Studio

Build that four-section sketch directly in your browser using our Mini Studio, a sequencer, piano roll and mixer that runs entirely online, with no DAW or installation required.

Open the Mini Studio ↗

Our own article on going from loop to full track covers this transition in more depth once you are ready for it.

Phase 5: finish, even when it is imperfect

The last phase is the one nobody wants to hear: get comfortable finishing tracks that are not perfect. Bring your levels roughly into balance, use EQ to stop elements from fighting for the same frequency space, and export. A rough mixdown you actually complete teaches you more than an unfinished project you polish forever, and this is not a shortcut, it is a documented pattern among producers who go from beginner to competent: those who finish many mediocre tracks improve faster than those who perfect one that never ships.

Where this leads

The five phases above are the same structure we use to teach the full path from zero to a finished, exportable track, built specifically around House, Techno and Organic House. If you want them developed with a complete curriculum, hands-on assignments and all 19 interactive tools included, that is exactly what the course below is for.

OHXALA RECORDS Academy

Electronic Music Production for Beginners

EMPB takes these five phases and builds them into a full curriculum, with hands-on assignments and the complete library of interactive tools.

Explore the course ↗

Try it now

Set a 20-minute timer. Program a four-on-the-floor beat with swing in the Drum Box. Build a two-note bassline in the synthesizer. Open the Mini Studio and combine both into an eight-bar sketch that loops cleanly. If you get there, you have already done more structured work than most people manage in their first month of self-taught production.

Further reading and watching

From loop to full track: how to stop starting and start finishing

Most producers have dozens of loops saved and almost no finished tracks. The problem isn’t talent or inspiration — it’s not knowing what comes after the loop. This article gives you a concrete system to go from a 2-bar idea to a complete track, without overcomplicating it.

1. Why loops don’t become tracks on their own

A loop is a proof of concept. It shows that an idea has potential. But finishing a track requires a different skill: arrangement. Arrangement is the art of controlling what the listener hears, when they hear it, and how much of it. Most producers avoid it because it feels less creative than making sounds — but it’s the thing that turns a sketch into music.

The single biggest mistake is trying to perfect the loop before arranging. If you spend three hours getting the kick right before you have a structure, you’re optimising something you don’t yet know how to use.

2. Know the shape before you build it

A functional electronic track has a predictable shape, and that predictability is a tool, not a limitation. Here’s a basic structure that works across most genres:

  • Intro (8–16 bars): stripped version of the main elements, creates expectation
  • Build (8–16 bars): elements enter gradually, tension increases
  • Drop/Main (16–32 bars): full energy, all key elements present
  • Breakdown (8–16 bars): space, contrast, stripped back again
  • Second build (8 bars): shorter than the first, the listener knows what’s coming
  • Second drop (16–32 bars): often a variation of the first
  • Outro (8–16 bars): elements exit one by one

You don’t need to follow this exactly. But you need a shape. Open a new arrangement view, create empty sections with markers, and name them before you place a single note.

3. Copy first, vary later

The most efficient way to fill an arrangement is to copy your loop into every section first, then remove what doesn’t belong. This is the opposite of how most beginners work. Instead of building each section from scratch, you start with everything everywhere and subtract.

Drop your loop across the entire arrangement. Then go section by section and mute or delete the elements that shouldn’t be there yet. The intro becomes the drop minus everything except a hi-hat and a kick. The breakdown becomes the drop minus everything except a pad and a bassline. You’ve just built a draft arrangement in twenty minutes.

4. Energy is movement, not volume

A common mistake is using volume automation to create energy changes. Turning the master up isn’t an arrangement — it’s a loudness change. Real energy comes from density: how many elements are playing, how complex the rhythmic pattern is, and how much spectral space is being used.

To build energy: add elements, increase rhythmic complexity, or open a filter. To drop energy: remove elements, simplify the pattern, or close a filter. The loudness should stay roughly constant throughout the track. The density changes.

5. Transitions do the work between sections

The moment between two sections is where most tracks fall apart. Without a transition, a section change feels like a cut in a badly edited film. The simplest transition toolkit that works every time: a riser (white noise filtered up over 4 bars), a crash cymbal on the downbeat of the new section, and a bass drop (one bar of silence in the bass just before the change). These three elements alone will make any arrangement feel intentional.

6. The “good enough” decision

The reason tracks don’t get finished is perfectionism applied at the wrong stage. At the arrangement stage, good enough is the goal. A track with a complete structure and imperfect sounds is infinitely more useful than a perfect loop with no structure. You can fix sounds later. You can’t finish a track that never had a shape.

Set a time limit: two hours to have a full draft arrangement, even if it’s rough. When the two hours are up, export a rough mix. Hearing your track as a continuous piece of audio — even a bad one — changes everything about how you approach the next session.

Try it now

Take any loop you have saved. Open a new arrangement. Paste the loop across 128 bars. In the next 30 minutes, create at least five distinct sections by muting and deleting elements. Export. Listen.

Sources and further reading

  • Ableton: Making Music by Dennis DeSantis — free PDF, chapters on arrangement and finishing tracks
  • Sound On Sound: “Arrangement Masterclass” series
  • YouTube: Underdog Electronic Music School — arrangement tutorials

How synthesizers work: building your first sounds from scratch

Most producers spend years adjusting presets without ever understanding what the controls actually do. That’s fine for getting results quickly, but it creates a ceiling: when a preset is close but not right, you have no framework to fix it. This article breaks down how subtractive synthesis works and ends with a concrete bass patch you can build in Ableton’s Analog from scratch.

What a synthesizer actually is

A synthesizer generates sound electronically, rather than recording it from the physical world. The most common type, subtractive synthesis, starts with a harmonically rich signal and removes content until you have the sound you want. The name comes from that process: you’re subtracting frequencies.

This is the opposite of how most people intuitively approach sound design. Instead of building a sound up by adding elements, you start with something complex and carve it down. Understanding that principle changes how you use every control on a synth.

The four fundamental blocks

A subtractive synthesizer has four essential components that always appear in the same order: oscillator, filter, amplifier, and envelope. Every other control on a synth modifies or interacts with one of these four.

The oscillator is the sound source. It generates a continuous waveform at a specific pitch. The shape of that waveform determines its harmonic content: a sine wave is a pure tone with almost no overtones, while a sawtooth wave is dense with harmonics and sounds bright and buzzy. Square waves sit somewhere between the two, producing a hollow, reedy character. In Ableton Analog, you can mix two oscillators together and detune them slightly to create a thicker, more complex source before you even touch the filter.

The filter is where the real sculpting happens. In subtractive synthesis, the most common type is a low-pass filter, which removes frequencies above a cutoff point. The further you lower the cutoff, the darker and more muffled the sound becomes. The resonance control boosts frequencies around the cutoff point, adding a characteristic peak that can range from a subtle emphasis to a sharp, aggressive sweep. In most bass sounds, a slow filter sweep opening from a low cutoff to a higher one is what creates that sense of a sound “coming alive.”

The amplifier controls the output volume of the signal. On its own, it would just produce a constant tone. That’s where envelopes come in.

The envelope shapes how a parameter changes over time, triggered by a MIDI note. The four stages are Attack, Decay, Sustain, and Release (ADSR). Attack determines how long it takes for the parameter to reach its maximum value after a note is triggered. Decay is how long it takes to fall from that maximum to the Sustain level. Sustain is the level held for as long as the note is held. Release is how long the parameter takes to fall to zero after the note is released. Most synths have at least two envelopes: one controlling the amplifier and one controlling the filter cutoff. A short attack and decay on the filter envelope creates a percussive “pluck” effect; a long attack creates a slow swell.

The LFO

A low-frequency oscillator (LFO) is like an envelope that loops continuously. Instead of triggering once per note, it oscillates between values repeatedly at a rate you control. Assign an LFO to the filter cutoff and you get an automatic filter wobble. Assign it to pitch and you get vibrato. Assign it to amplitude and you get tremolo. The LFO’s speed and shape change the character of the modulation entirely.


Building a bass patch in Analog

Open a new MIDI track in Ableton and load Analog (found under Instruments). Start with the Init preset if one is available, or manually reset the key values.

Set Oscillator 1 to a sawtooth wave. This gives you a bright, harmonically rich starting point. Set the volume to around 80%. Add Oscillator 2 and tune it down one octave (12 semitones). Set its volume to around 50%. This adds low-end weight without muddying the fundamental.

Move to the filter section. Set the filter type to a low-pass (LP) and bring the cutoff down to around 400-600 Hz. Set resonance to around 20-25%. Now open the filter envelope and set a short Attack (0-5 ms), a Decay of around 300-400 ms, a Sustain at 30%, and a Release of around 100 ms. Increase the envelope amount to taste. You should now hear the filter opening briefly at the start of each note, which gives the bass its attack character.

For the amplitude envelope, set Attack to 0 ms, Decay to about 100 ms, Sustain to 80%, and Release to about 80 ms. This keeps the bass present and defined without clicks at the start or an abrupt cutoff at the end.

Play a pattern on a low note (E1 or F1 works well). What you should hear is a clean, filter-driven bass that responds dynamically to every note.

Next steps

This patch is a functional starting point, not a finished sound. From here, explore what detuning the oscillators does to the width and movement of the bass. Try modulating the filter cutoff with a slow LFO to add subtle movement over time. Adjust the envelope decay to make the attack character more or less pronounced.

The goal at this stage isn’t to sound like a specific genre. It’s to understand why a control does what it does and be able to predict the result before you move the knob. Once that connection is clear, any preset becomes readable, and any sound becomes buildable.

Try it now: Build the patch described above, then change only one variable at a time. First, swap the sawtooth for a square wave and compare. Then, increase the filter resonance until the cutoff starts to self-oscillate. Then, extend the filter envelope attack to 200 ms and notice how the feel of the bass changes. Document what you hear.


Use our synth and test what you just learned

Sources and further reading:

  • Ableton official documentation: Learning Synths (interactive, browser-based)
  • Sound On Sound: “Synth Secrets” series by Gordon Reid
  • YouTube: Underdog, Intro to Subtractive Synthesis
  • Ableton Learn: How Analog Works

Your first collaboration: How to turn ideas into explosive tracks and expand your network

Alone in the studio? Unlock new creative powers!


Electronic music production can often feel like a solitary pursuit. You spend hours in your home studio, perfecting every detail, but sometimes, a fresh perspective or a different skill set is exactly what you need to break through creative blocks or push your music further. This is where collaboration comes in – it’s not just about sharing the workload; it’s about multiplying your creative potential.

This article will guide you through the exciting world of your first music collaboration. We’ll cover how to find the right partners, manage creative differences, and leverage joint efforts to produce tracks that truly explode with new ideas. More than just making music, you’ll learn how to expand your network and grow as an artist. Ready to find your creative tribe? Let’s connect!

Day 1: Finding your tribe – Who to collaborate with?


The right collaborator can elevate your music. The wrong one can lead to frustration. Start by identifying your goals and strengths.

Your Mission:

  1. Self-Assess: What are your strengths (e.g., beat-making, melody, sound design, mixing)? What are your weaknesses or areas you want to improve?
  2. Identify Potential Partners:
    • Friends/Acquaintances: Do you know anyone who produces, sings, or plays an instrument? Even if they’re not electronic producers, they might bring a unique perspective.
    • Online Communities: Explore forums (Reddit: r/musicproduction, r/edmproduction), Discord servers, or Facebook groups dedicated to music production. Look for “collaboration wanted” posts.
    • Local Scene: Attend local electronic music events, open mics, or producer meetups in your area (if applicable).
  3. Define the Skill Gap: Look for someone whose skills complement yours. If you’re great at beats but struggle with melodies, look for a melodic wizard.

Why this matters: A good fit is crucial. Collaboration should feel exciting, not like a chore.

Day 2: The pitch & the spark – Initiating contact


Once you’ve identified potential collaborators, it’s time to reach out thoughtfully.

Your Mission:

  1. Be Specific & Respectful: Don’t just send a generic “wanna collab?” message.
    • Mention something specific you admire about their work.
    • Clearly state what you bring to the table.
    • Propose a small, manageable project (e.g., “Let’s try to flesh out a 1-minute loop,” or “I have a bassline, could you add some drums?”).
  2. Share Your Best Work: Link to 1-2 of your best (even if unfinished) tracks. This shows you’re serious and capable.
  3. Manage Expectations: Be open about your level of experience and what you hope to achieve.

Why this matters: A professional and respectful approach increases your chances of finding willing and talented partners.

Day 3: The creative process – Sharing & building together


Now the fun begins! Establishing a clear workflow is key to avoiding confusion.

Your Mission:

  1. Choose a Collaboration Method:
    • File Sharing (e.g., Google Drive, Dropbox): Simple for sending project files back and forth. Always version control! (e.g., track_v1.0_yourname.flp, track_v1.1_theirname.flp).
    • Cloud DAWs (e.g., Splice Studio, BandLab): Allow real-time or near real-time collaboration directly in the cloud. Explore if your DAW has similar features.
  2. Define Roles (Loosely): Decide who focuses on what initially. One person might start with drums, the other with a synth. Be flexible!
  3. Regular Communication: Set up regular check-ins (e.g., once a week) via text, call, or video. Discuss progress, challenges, and next steps.
  4. Embrace Feedback: Give and receive constructive criticism openly. Remember, it’s about making the track better, not about ego.

Why this matters: A structured yet flexible approach prevents miscommunication and keeps the creative momentum going.

Day 4: Navigating challenges – The “friendly collaboration agreement”


Even the best collaborations face hurdles. Addressing potential issues early prevents bigger problems later.

Your Mission:

  1. Credit & Ownership (Even for small projects!): Discuss upfront how credit will be shared. If it’s a 50/50 creative split, that’s simple. If one person did 80% and the other 20%, agree on that.
  2. Decision Making: How will major creative decisions be made? By consensus? Does one person have the final say on certain elements?
  3. Communication Issues: If misunderstandings arise, address them directly and calmly. Focus on the music, not personal attacks.
  4. “Exit Strategy”: What happens if one person needs to step back from the project? Agree on how to handle unfinished work or split elements.

Why this matters: Open and honest communication about potentially sensitive topics builds trust and ensures a smooth working relationship, no matter the outcome.

Day 5: Beyond the Track – Building Your Network & Growing


A successful collaboration extends beyond the final track. It’s about building relationships.

Your Mission (Ongoing):

  1. Celebrate Successes: Finish the track, even if it’s just a rough demo! Share it privately with friends and family.
  2. Promote Each Other: If the track is released, actively promote your collaborator’s work and vice-versa.
  3. Learn & Reflect: What went well? What could be improved next time? What new skills did you gain?
  4. Stay Connected: Even if you don’t collaborate immediately on another project, stay in touch. Future opportunities often arise from past positive experiences.
  5. Expand Your Horizons: Now that you’ve collaborated once, think about other types of collaborations – vocalists, instrumentalists, visual artists, DJs, even sound designers.

Why this matters: Collaboration is a powerful networking tool. Positive experiences lead to more opportunities and a stronger presence in the music community.

Your collaborative journey begins!


Your first collaboration might seem intimidating, but it’s a highly rewarding step in your journey as an electronic music producer. It pushes you, expands your horizons, and opens doors to unforeseen creative pathways. Embrace the shared experience, learn from every interaction, and watch your music and your network grow.